
Introduction
In the fascinating realm of ceramics, artists constantly seek ways to enhance both form and function. One essential and versatile material that plays a significant role in pottery is slip. So, what is slip in ceramics? Slip is a mixture of clay, water, and other additives that offer a wide range of applications in ceramic arts. From decoration to joining pieces, understanding slip and its uses can dramatically improve your pottery practice. This comprehensive guide will delve into the concept of slip in ceramics, explore its significance, and provide practical insights on how to use it effectively in your artwork.
What is Slip in Ceramics?
Definition of Slip
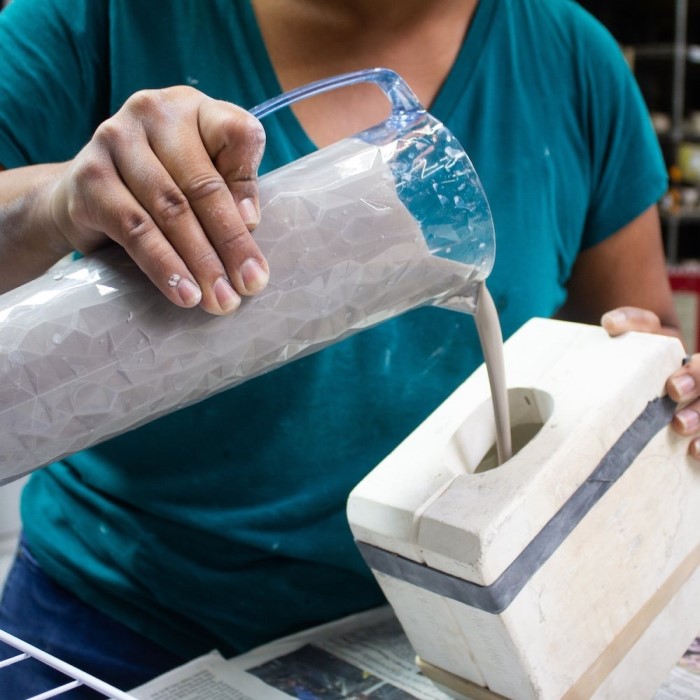
Slip is a liquid mixture that primarily consists of clay and water, although it may include other additives such as colorants, fluxes, or even small aggregates.
- Composition of Slip:
- Clay: The primary component, which provides the slip with its texture and bonding characteristics.
- Water: This makes the mixture fluid and workable, allowing it to be applied easily.
- Additives: Artists can include stains or oxides to create colored slips for decorative purposes, as well as fluxes that affect the fluidity and adhesion of the slip.
Historical Significance of Slip
Historically, slip has been vital in the decorative arts, particularly in ceramics. Different cultures have adopted slip techniques, creating unique styles and applications.
- Ancient Uses: Slip techniques date back to ancient civilizations, such as in Greek pottery, where it was applied for decorative patterns.
- Cultural Variations: Various cultures utilized slip differently; for instance, in China, slip was used for intricate surface decoration while in Native American pottery, slips contributed to rich color and surface texture.
Types of Slip in Ceramics
There are several types of slip, each with distinct properties and applications in the ceramics field:
1. Colored Slip
- Usage: Artists use colored slip to enhance the appearance of their pottery by applying it on the surface for decorative effects.
- Benefits: The ability to create vibrant colors adds depth to ceramic pieces, making them visually appealing.
2. Engobe
- Application: Engobes apply to greenware to achieve a smooth surface or to prepare for glazing.
- Thin Application: They can layer to create depth in color and texture without adding bulk.
3. Sgraffito Slip
- Process: Artists apply a layer of slip before allowing it to dry. Once dried to a leather-hard state, they carve designs into the slip to expose the contrasting color underneath.
4. Attachment Slip
Also known as “joining slip,” this type of slip use to bond two pieces of clay together.
- Function: By using a slip that contains the same clay body, ceramicists significantly reduce the risk of cracks in the finished product after firing.
- Application: To use attachment slip, score the surfaces of both pieces, apply the slip, and firmly press them together.
How to Use Slip in Ceramics Effectively
What is slip in ceramics? Using slip effectively requires a good understanding of preparation and application techniques.
Preparing Your Slip
Select the Right Clay:
Choose a clay type that matches the clay body of your specific project.
Using a compatible clay ensures that both materials bond effectively during firing, minimizing the risk of cracks or separations.
Consider the firing temperature and color of the clay to achieve the desired final appearance of your piece.
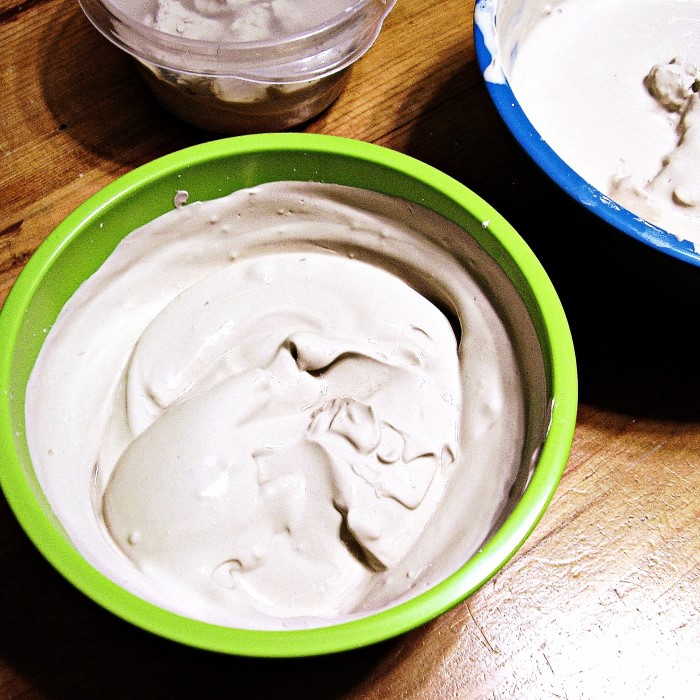
Mixing:
Combine clay and water in appropriate ratios to create a slip that meets your project needs.
A common formula for slip is approximately 50% clay to 50% water, which strikes a balance between thickness and flow.
Depending on your desired consistency—whether thicker for sculptural work or thinner for glazing—adjust the ratios accordingly.
Blending:
Carefully stir or mix the clay and water combination to ensure there are no lumps or inconsistencies in the texture.
Utilize tools like a paddle, a hand mixer, or a blender to effectively blend the materials.
Achieve a smooth, uniform consistency, which is crucial for the application of slip to ensure it adheres well during the firing process.
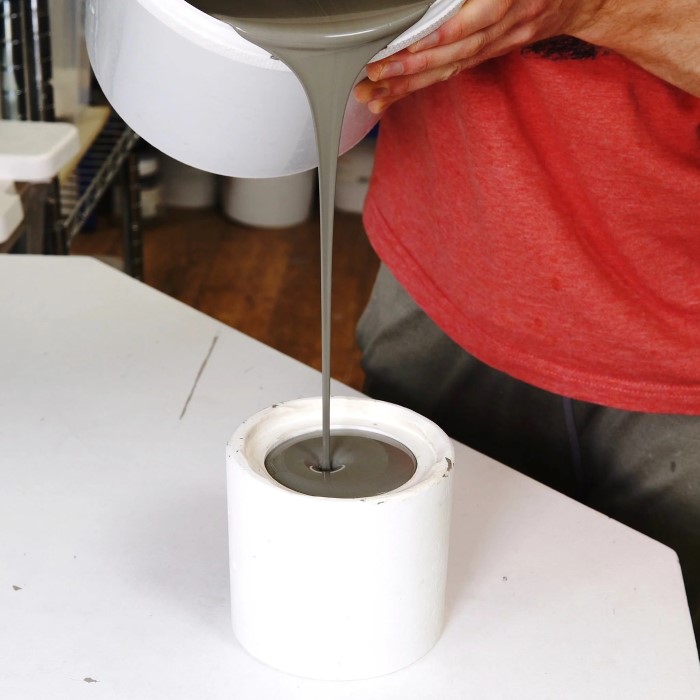
Applying Slip
- Choosing Application Techniques: Slip can be applied in various ways, including brushing, pouring, or spraying. Select a method based on the needs of your project and your desired outcome.
- Layering: For depth and complexity, consider layering different slips on your piece. This can create fascinating textures and colors that enhance visual interest.
- Timing: Slip should ideally be applied while the clay is at the leather-hard stage. This stage retains enough moisture to support the slip’s adherence while allowing for detailed work.
Decorating with Slip
Brush and Sponge Techniques
- Tools Needed: Gather your materials, including various brushes (such as flat, round, and detail brushes) and sponges. Different brushes allow for different effects, while sponges can create texture and smooth finishes.
- Preparing the Slip: Ensure the slip is well-mixed and at a suitable consistency before application. A smooth, fluid slip will allow for easier, more even application on your pottery surfaces.
- Application Methods:
- Using a Brush: Dip the brush into the slip and apply it to the pottery surface. Use even strokes, working from one edge to the other to maintain a consistent coat.
- Flat Brush: Ideal for covering large areas and providing a smooth, even layer.
- Detail Brush: Useful for intricate designs and reaching small, detailed areas.
- Using a Sponge: Press and pat the sponge into the slip, then gently dab it on the surface of the pottery. This method is excellent for achieving texture and softer edges.
- Texture Creation: Different sponge types (like sea sponges or natural sponges) can create varied textures, complementing the overall design of your piece.
- Using a Brush: Dip the brush into the slip and apply it to the pottery surface. Use even strokes, working from one edge to the other to maintain a consistent coat.
- Controlling Slip Amount: Pay attention to the amount of slip applied. It is crucial to avoid drips or uneven patches. Practice using less slip at first and build up layers if needed, allowing for greater control over the final look.
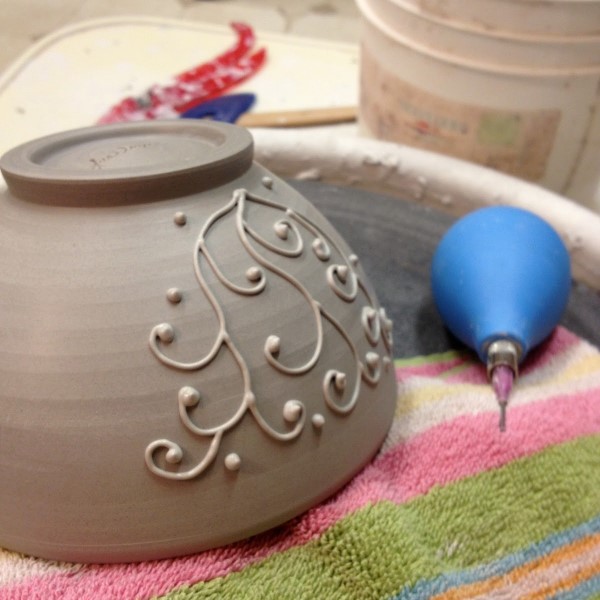
Slip Trailing
- What is Slip Trailing? Slip trailing is a decorative technique where slip is applied to pottery in a controlled manner, often using a piping bag.
- Essential Tools:
- Piping Bag: Use a disposable piping bag fitted with a small nozzle to create a fine line of slip. Alternatively, a squeeze bottle can work well for this purpose.
- Slip Consistency: Ensure that the slip is fluid but not too runny, as this will affect how well it holds its shape when applied.
- Technique Steps:
- Fill the Piping Bag: Carefully fill the piping bag with prepared slip, ensuring there are no air bubbles.
- Apply to Pottery: Squeeze the slip gently from the piping bag onto the surface of your pottery, creating desired lines and patterns. You can vary the pressure for thicker or thinner trails.
- Decorative Effects: Slip trailing adds dimension and detail to your pieces, making it a popular choice for floral patterns, abstract designs, and more complex decorative elements.
Sgraffito Techniques
- Understanding Sgraffito: Sgraffito is a technique where designs are carved into a layer of slip to reveal the base clay beneath. It allows for a striking contrast between the colored slip and the natural clay color.
- Preparing for Sgraffito:
- Apply Slip: First, apply a layer of slip to your pottery piece, ensuring it is even and covers the areas you wish to decorate.
- Drying Stage: Allow the slip to dry slightly until it reaches a leather-hard stage. This means the slip is firm enough to hold a design but still malleable for carving.
- Carving Process:
- Select Your Tools: Use various carving tools, including loop tools, knives, or fine-pointed implements, to create designs.
- Design Planning: Sketch your design lightly onto the slip with a pencil or marker beforehand, or go freehand for more spontaneous creativity.
- Carving Technique: Carefully carve into the slip to expose the underlying clay, ensuring you apply even pressure and control over your cuts.
- Achieving Contrast: The result will showcase the natural color of the clay body against the colored slip, creating beautiful and intricate patterns. Experiment with different design styles to see how they reflect the texture and depth of your work.
Common Issues and Solutions
Problem: Slip Separation
Occasionally, you may notice that the slip does not adhere well to your piece.
- Solution: Ensure you have the right moisture level in both your clay and slip. The combination should be workable enough to bond well, but not so wet that it slides off the surface.
Problem: Dripping Slip
If your slip is too runny, it may drip off your piece before it can dry properly.
- Solution: Adjust the consistency by adding additional clay or reducing water content. Test it on a separate piece of clay to find the right balance.
FAQs
What is slip and how is it used?
Slip is a mixture of clay and water used in ceramics for decoration, joining pieces, and enhancing surfaces.
Is slip just watered down clay?
Yes, slip is essentially a watered-down mixture of clay, but it may also contain additional materials for improved texture, color, or bonding properties.
What is a slip used for?
Slip is commonly used for decorative applications, acting as an adhesive for joining clay pieces, and providing texture and color enhancements to ceramic pieces.
How do you make slips in ceramics?
To make slip, combine clay with water, adjusting ratios to achieve the desired consistency. Blend well to create a homogeneous mixture, ensuring there are no lumps.
Conclusion
Understanding what is slip in ceramics and how to use it effectively can significantly enhance the quality and creativity of your pottery projects. By preparing your slip correctly, applying it thoughtfully, and utilizing various techniques, you can create stunning ceramic pieces with visually rich textures and colors. As you experiment more with slip, you will discover its versatility and potential to transform your work. Whether you’re a beginner or a seasoned potter, mastering slip techniques will elevate your ceramics and broaden your artistic horizons.