

Introduction
Oil pastels are a versatile medium, perfect for both beginners and experienced artists. They offer a unique blend of vibrancy and texture, making them an excellent choice for creating colorful works of art. If you’re looking to elevate your skills with oil pastel techniques, understanding color blending can significantly enhance your artwork. In this comprehensive guide, we will explore various oil pastel techniques, focusing on color blending methods that will help you create stunning visual effects with your art.
Understanding Oil Pastels
What Are Oil Pastels?
Oil pastels are a type of medium that combines the richness of oil paint and the portability of crayons. Their formulation includes pigment, a non-drying oil, and a wax binder, which gives them a creamy texture that spreads smoothly on paper. This unique composition allows for vibrant colors and versatile applications.
Benefits of Using Oil Pastels
There are several advantages to using oil pastels:
- Vibrant Colors: They offer a wide range of brilliant hues that stand out on a variety of surfaces.
- Blendability: Oil pastels can be easily blended, allowing for smooth transitions and a rich color palette.
- Easy Application: These pastels require no special tools or setup, making them accessible for artists of all skill levels.
Color Blending Techniques
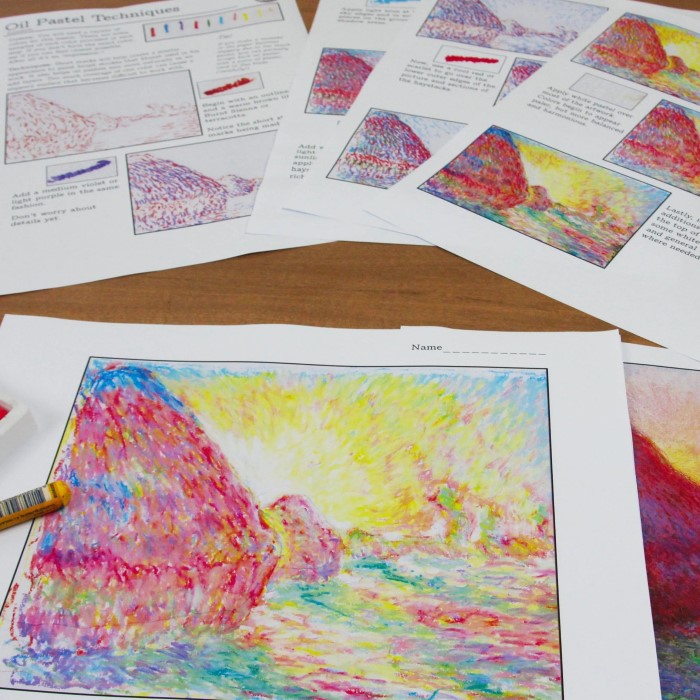
1. Basic Blending Techniques
Blending is one of the essential oil pastel techniques for oil pastels that allows you to create smooth transitions between colors. Here’s how to do it:
- Layer Application: Start by applying a base color lightly. Then add a second color, allowing them to overlap slightly.
- Using Tools: Use your fingers, blending stumps, or cotton swabs to gently smudge the colors together, creating a seamless blend.
- Practice Gradations: Create a gradient by adding more of one color as you transition to another, producing beautiful soft hues.
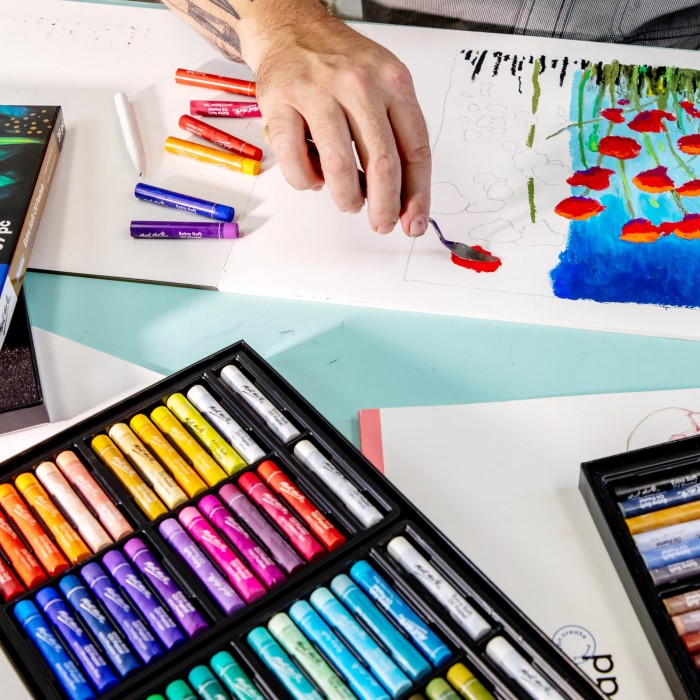
2. Layering Colors
Layering is another powerful method to achieve depth and vibrancy in your artwork. Here’s how you can layer effectively:
Start with a Base Color:
-
- Begin your artwork by applying a light base color to the entire area where you’ll be adding details or additional colors.
- This base layer serves as a foundational tone that will illuminate the subsequent shades and add depth to your piece.
- Choose a light color that complements the overall theme of your artwork, as it will influence the colors applied on top.
- Use smooth, even strokes to ensure that the base color is consistently laid down, which will provide a solid foundation for the other layers of color that follow.
Gradual Darkening:
-
- Once your base color is laid down, gradually introduce darker shades on top of it. This technique allows you to create depth and dimension within your piece.
- Start by selecting a slightly darker version of the base color, then progressively work your way towards even deeper shades.
- As you apply the darker colors, be mindful to allow the lighter shades beneath to peek through. This layering technique helps create a three-dimensional effect that makes your artwork more visually engaging.
- You can use a soft blending technique at the edges of the darker colors to help them transition into the lighter base, achieving a smooth gradient that gives life to your piece.
Applying Pressure:
-
- Varying the pressure you apply while coloring can help create distinct layers and enhance the textural contrast in your artwork.
- For example, applying lighter pressure with your tool produces a more subtle application of color, allowing the base underneath to show through, while increasing pressure can result in richer, more saturated colors.
- This technique can be especially useful when you want to create areas of shadow or highlight, as it allows you to control the intensity and depth of the colors you’re working with.
- Experimenting with different pressures also encourages a playful approach to your art, allowing for unique textures and effects that can add complexity to your work.
Advanced Blending Techniques
1. Sgraffito Technique
Sgraffito is a technique where you scratch into the layers of oil pastels to create intricate designs and textures:
- Layering Colors: Begin by applying a thick layer of colorful pastels to your surface.
- Scratching Technique: Use a sharp tool like a craft knife or a toothpick to scratch away the top layer, revealing the colors beneath and creating detailed patterns.
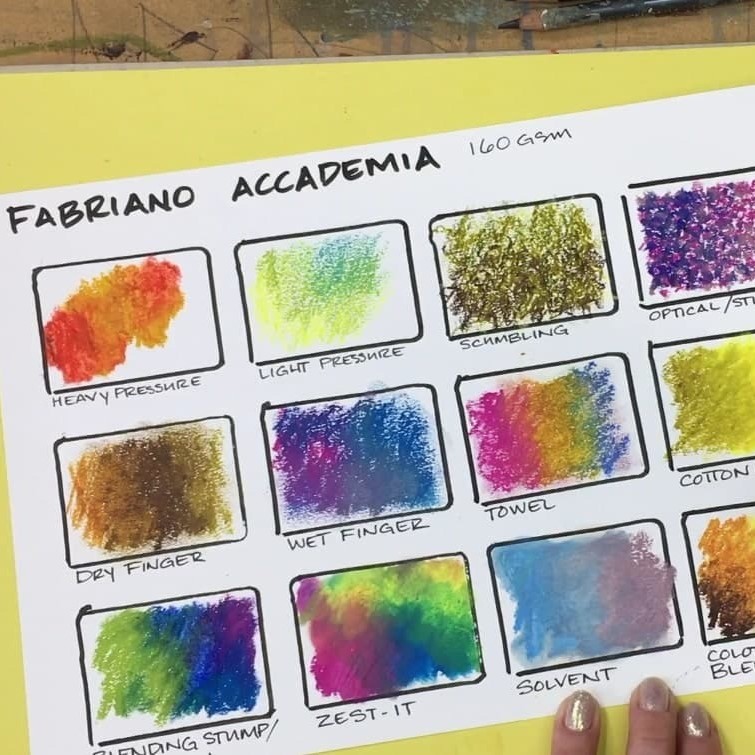
2. Blending with Solvents
Using solvents can allow for smoother blends and a slightly different texture:
Select a Solvent:
-
- When working with oil pastels, choosing the right solvent is crucial for effective blending and achieving the desired effects.
- One effective option is odorless mineral spirits, which are less harsh and have a more subtle scent compared to traditional solvents, making them a popular choice for artists concerned about fumes.
- Other solvent options include turpentine or various commercial blending mediums, but odorless mineral spirits are generally preferred for their ease of use and minimal odor.
- Always ensure that you are working in a well-ventilated area when using solvents to maintain a safe and comfortable working environment.
Apply with a Brush:
-
- To achieve the best blending results, dip a small, clean brush into the chosen solvent. A flat or round brush with soft bristles is ideal for this technique.
- Gently tap off any excess solvent to avoid oversaturating the brush, as too much liquid can lead to unintended runs or messiness.
- Begin applying the solvent to the areas of your artwork where you want to create a softer blend. Be mindful to start with a light touch, gradually building up as needed to avoid damaging the paper or pastels.
Blend Away:
-
- After applying the solvent, use the brush to work the colors together, moving in circular or sweeping motions to blend the pastel strokes seamlessly.
- This technique creates a painterly effect that can mimic the qualities of watercolor or acrylic paints, resulting in smooth transitions between colors and a more cohesive composition.
- Experiment with different brush sizes and pressures to achieve various textures and effects; lighter strokes may produce softer blends while firmer strokes can create more pronounced transitions.
- Allow yourself to be creative during this process; don’t worry about making it perfect on the first pass. You can always add more layers of pastel or use additional solvent to refine your artwork further.
Tips for Creating Stunning Artwork
1. Choosing the Right Paper
The type of paper you use can have a significant impact on your artwork. Select paper meant for oil pastels or mixed media, as this can hold the layers better. Textured papers can also enhance the grip of the pastels, allowing for better application.
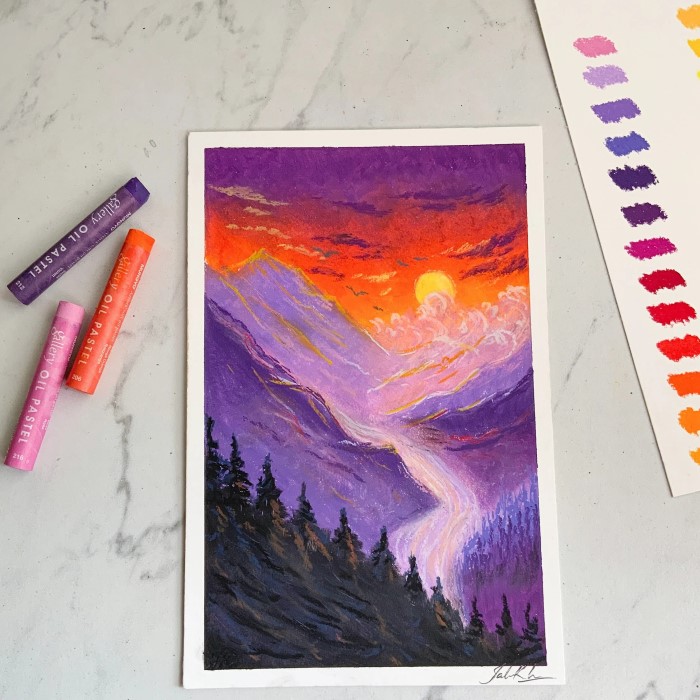
2. Experimenting with Color Combinations
Don’t hesitate to play with various color combinations. Mixing complementary or analogous colors can yield stunning results. Keep a color wheel handy to assist in choosing color pairings that work well together.
3. Practicing Texture Techniques
Incorporate various oil pastel techniques to add texture to your artwork. You might try stippling with the tip of the pastel or creating lines for added depth. Experimenting with how you apply the pastels can lead to unique styles that enhance your art.
Common Mistakes with Oil Pastels
1. Overworking the Surface
A common mistake is over-blending or overworking the oils, which can lead to a muddy appearance. It’s crucial to remain mindful of how many layers you apply; it is best to stop once you achieve the desired effect.
2. Neglecting Cleanliness
Keeping your workspace and tools clean is vital for maintaining the integrity of your artwork. Residual pastels on your fingers or tools can contaminate colors, causing unexpected outcomes. Regularly wash your hands and tools during the process.
Frequently Asked Questions
What is the rule of 3’s for oil pastels?
The rule of 3 states that using no more than three main colors in a piece can lead to harmony and balance in your artwork.
What is a common mistake you can make with pastels?
A common mistake is applying too much pressure or layering excessively. This can lead to a loss of color vibrancy and poor texture.
How to use oil pastels step by step?
To use oil pastels, start by selecting a clean surface, apply a base color lightly, layer additional colors, blend them as desired, and finish with details or unique designs.
How to make oil pastel look good?
To enhance the appearance of oil pastels, use proper blending techniques, choose quality paper, opt for complementary colors, and avoid overworking the surface.
Conclusion
In conclusion, mastering oil pastel techniques can significantly transform your artistic capabilities. By understanding color blending, layering, and different techniques, you can create stunning artworks full of depth and vibrancy.
Experimentation is key in discovering what works best for you and your artistic expression. Developing a personal style takes time and patience, but the results will be well worth the effort.
As you continue your journey with oil pastels, remember to embrace the medium’s unique qualities, and don’t hesitate to explore new techniques. With practice, your skills and creativity will flourish, ultimately leading to artwork that reflects your artistic vision. Happy creating!