
Introduction
If you’re venturing into the world of ceramics and pottery, mastering different techniques is essential for enhancing your artistic skills. One such technique is the sgraffito technique, a method that enables pottery artisans to create intricate designs by relying on the contrast between the surface glaze and the underlying clay color. In this article, we will explore what the sgraffito technique is, how it works, and useful tips for beginners to get started. Understanding this technique opens up creative opportunities to bring your pottery designs to life!
What is the Sgraffito Technique?
Definition and Origin
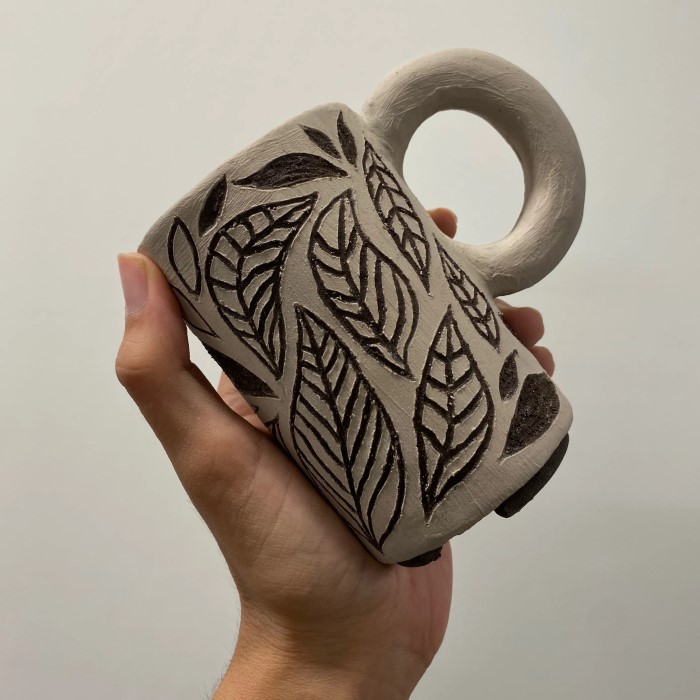
The term sgraffito comes from the Italian word “sgraffiar,” meaning “to scratch.” This artistic technique involves scratching through a surface layer to reveal a contrasting color beneath.
- Application in Pottery: In pottery and ceramics, artisans typically apply a colored slip or glaze over leather hard clay, allowing for the creation of beautiful decorative motifs.
- Historical Context: Historically, sgraffito has roots in various cultures, appearing in ancient pottery across Europe and Asia. Its unique ability to create visual depth contributes to its staying popularity among artists.
How It Works
The sgraffito technique functions on two primary layers: the top layer (usually a colored slip or glaze) and the bottom layer (the clay body).
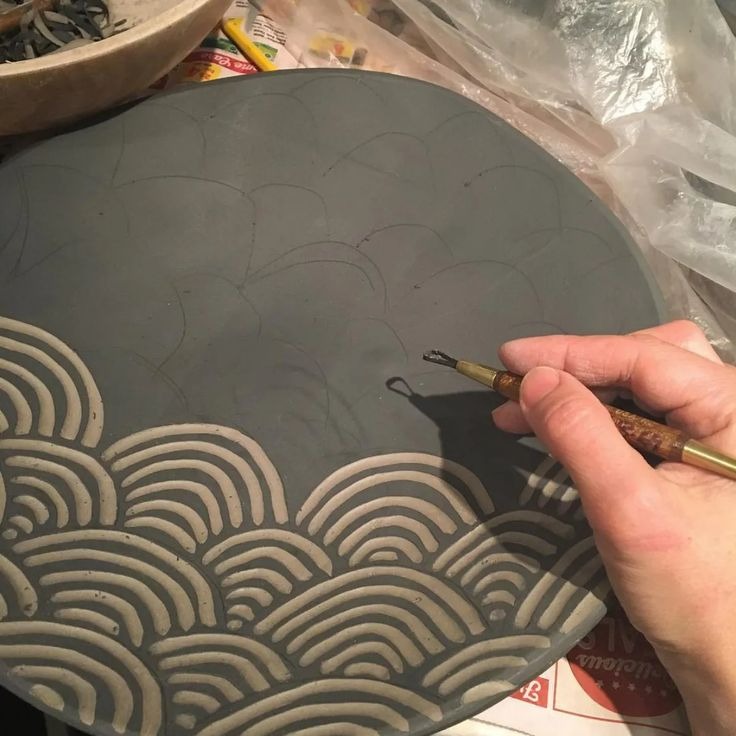
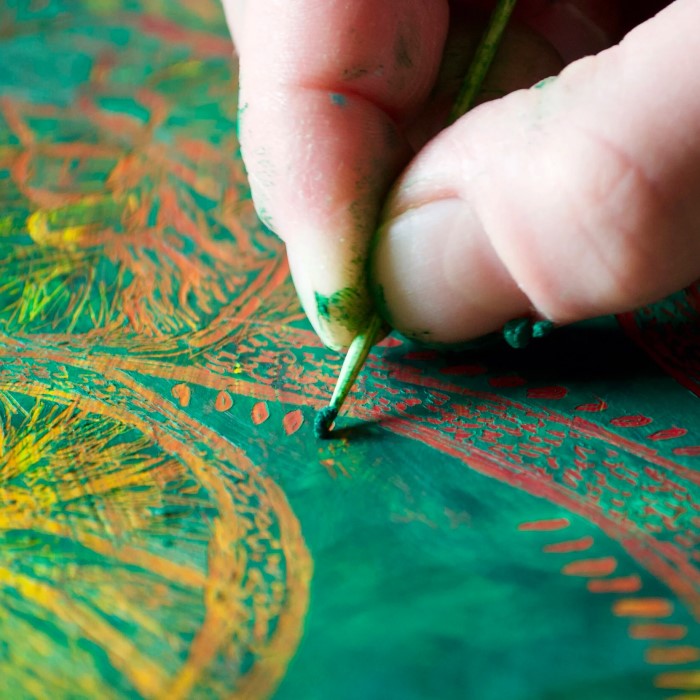
- Layering: Initially, potters apply a layer of slip or colored glaze onto leather hard clay. After the top layer has set slightly but not fully dried, the artist uses tools to scratch away specific sections, exposing the base clay.
- Resulting Contrast: This technique allows for rich visual contrast between the colored surface and clay body. The design options can range from simple lines to intricate patterns, creating unique pieces in pottery.
Tools Required for Sgraffito
Essentials for the Process
To successfully employ the sgraffito technique, specific tools will be highly beneficial.
- Carving Tools: Use a variety of carving tools such as loop tools, knives, or even wooden styluses to scratch the surface of the clay accurately.
- Brushes: Fine brushes are necessary for applying slip or glaze evenly across the surface of the clay. Different brush sizes help create varying design effects.
- Sponge: A damp sponge can help smooth out the surface before and during the application of slip, ensuring an even finish.
- Stencils (Optional): If you wish to create precise or repeated patterns, using stencils can streamline your process and enhance detail.
Preparing Your Workspace
Ensuring a clean and organized workspace is crucial when working with this technique. Make sure you have all your tools within reach, as it helps improve efficiency and creativity during the artistic process.
Step-by-Step Guide: How to Do Sgraffito
Preparation Stage
Before diving into the sgraffito technique, there are specific preparatory steps to undertake.
- Choose the Right Clay: Select a clay body that suits your desired outcome. Earthenware or stoneware works well for sgraffito due to their textural properties.
- Form Your Piece: Shape your pottery as desired and leave it at the leather hard stage. Leather hard clay is crucial because it retains its form yet is still workable.
- Apply Slip or Glaze: Use a brush to apply a colored slip or glaze evenly across the leather hard surface. Allow the slip to set slightly but not dry fully.
Execution of Sgraffito
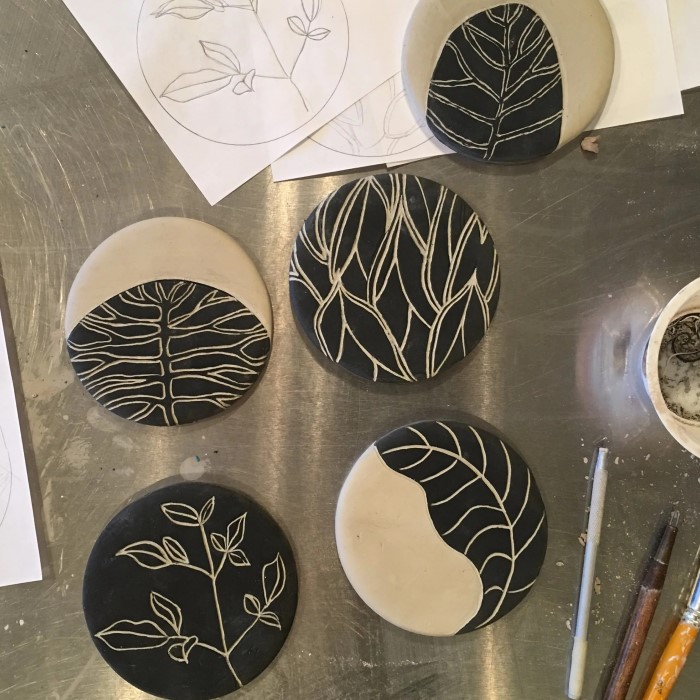
- Design Planning: Plan your design beforehand. Sketch ideas on paper, which can serve as a guide during the scratching process.
- Begin Scratching: Use carving tools to scratch out your design. Apply even pressure while being careful not to dig too deep into the underlying clay.
- Adjust as Needed: Make any adjustments during this process. Take your time, as accuracy in this step is essential for achieving a polished look.
Final Steps
- Clean Up Edges: After completing your design, return with a damp sponge to clean up any rough edges or excess residue.
- Drying and Firing: Allow the piece to dry completely before firing it in the kiln. Be mindful of slow, even drying to prevent cracks.
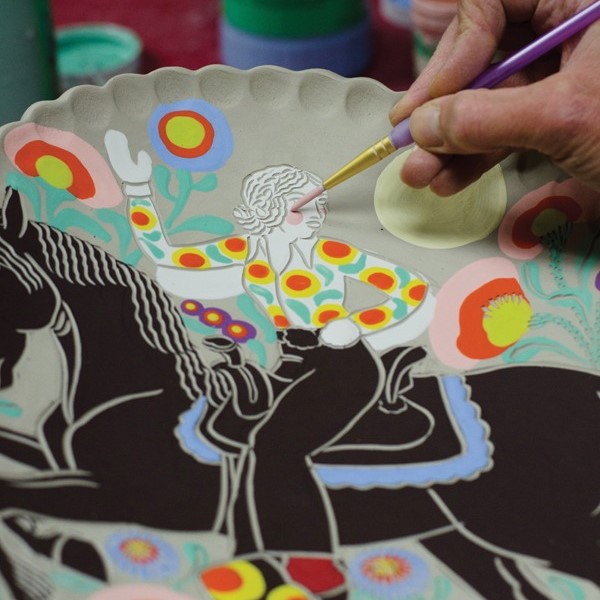
- Glaze Application (If Desired): After the initial firing, you can apply a transparent glaze to enhance the design’s contrast and provide a glossy finish.
Common Mistakes to Avoid in Sgraffito
Pitfalls for Beginners
Many novice potters encounter challenges when using the sgraffito technique. Here are some common mistakes:
Rushing the Drying Process:
-
- It’s essential to allow your clay piece to progress naturally to the leather hard stage. This stage is critical as it provides the right balance of firmness and moisture.
- If you hasten the drying process by applying heat or placing it in a draft, the clay may become too dry on the surface while remaining wet inside.
- When the clay is still too wet, any scratching or carving can lead to distortion, warping, or uneven surfaces, compromising the overall structure and aesthetic of your work.
- Patience is key; allowing the piece to dry slowly will enhance its durability and allow for more precise detailing during the sgraffito technique.
Uneven Slip Application:
-
- Applying slip unevenly can lead to a lack of harmony in your design, creating patterns that may appear jarring or unintentional rather than seamless and cohesive.
- Before applying slip, ensure that your application tools, whether brushes, sponges, or fingers, are clean and appropriate for the job to avoid contaminants.
- Strive for consistent pressure and technique when applying slip to ensure a uniform thickness, which is vital for achieving consistent texture and color once the piece is fired.
- Regularly check your application as you proceed to make necessary adjustments, ensuring an even coverage that enhances the beauty of your masterpiece.
Over-Engaging with Texture:
-
- While incorporating texture can add depth and interest to your work, excessive scratching or aggressive manipulation of the clay can create structural weaknesses.
- Be mindful of how much pressure you apply while working with textures; a gentle touch can create beautiful effects without jeopardizing the integrity of the piece.
- After achieving the desired texture, step back and assess your work from different angles; this can prevent excessive alterations that may damage the surface.
- Remember that subtlety can often lead to more sophisticated results, so consider limiting the extent of your texturing for a balanced appearance.
Skipping Design Planning:
-
- Entering the sgraffito process without a clear design plan can lead to improvisation that may not align with your vision, resulting in dissatisfaction or the need to start over.
- Take time to sketch your ideas on paper, outlining the elements you want to incorporate, which can help forge a clearer direction for your work.
- Consider the potential constraints of the material and the technique; understanding the limits can aid in refining your design to fit within these boundaries.
- By establishing a clear plan and visualizing the finished piece beforehand, you can effectively reduce waste and enhance both time management and resource utilization during the creation process.
Best Stage of Clay for Sgraffito
Timing is Everything
The best stage of clay for sgraffito is leather hard, as previously mentioned. At this stage:
- Workability: The clay is firm enough to hold its shape, allowing artists to scratch intricate designs without the risk of distortion.
- Moisture Retention: Leather hard clay retains enough moisture to facilitate carving without becoming brittle or fragile.
Signs Your Clay is Leather Hard
- Surface Texture: The surface should appear matte rather than shiny.
- Indentations: You can press lightly with your finger, leaving a slight mark without deforming the piece.
FAQs
How to do sgraffito step by step?
To execute sgraffito, form your pottery piece from clay, apply a layer of slip, allow it to reach leather hard consistency, then scratch your design into the surface. Clean the edges and dry before firing.
What is the sgraffito technique?
The sgraffito technique involves applying a colored slip over leather hard clay and scratching designs into the surface to reveal a contrasting color beneath.
What are common sgraffito mistakes?
Common mistakes include rushing the drying process, uneven slip application, over-engaging with texture, and skipping the design planning stage.
What stage of clay is best for sgraffito?
The best stage of clay for sgraffito is leather hard. At this stage, the clay is firm enough to hold designs while still adaptable for carving.
Conclusion
In conclusion, the sgraffito technique offers exciting opportunities for enhancing your pottery creations. By understanding its definition, mastering essential tools, and following step-by-step guidance, you can elevate your pottery skills. Remember to plan your designs carefully and be aware of the common mistakes that can hinder your progress. By practicing and honing your sgraffito technique, you’ll create stunning ceramic works, enriching your artistic journey!