
Introduction: Exploring the Allure
When it comes to ceramics, few finishes can match the radiant beauty and elegance of gold luster pottery. This decorative technique enhances pottery pieces, providing a stunning visual appeal that attracts both collectors and casual admirers alike. Gold luster achieves a unique shimmer, transforming ordinary ceramic objects into extraordinary works of art. This guide will delve into the art and science of gold luster pottery, exploring various techniques, the application process, and considerations for using it in functional wares.
What is Gold Luster Ceramic?
1. Definition and Characteristics
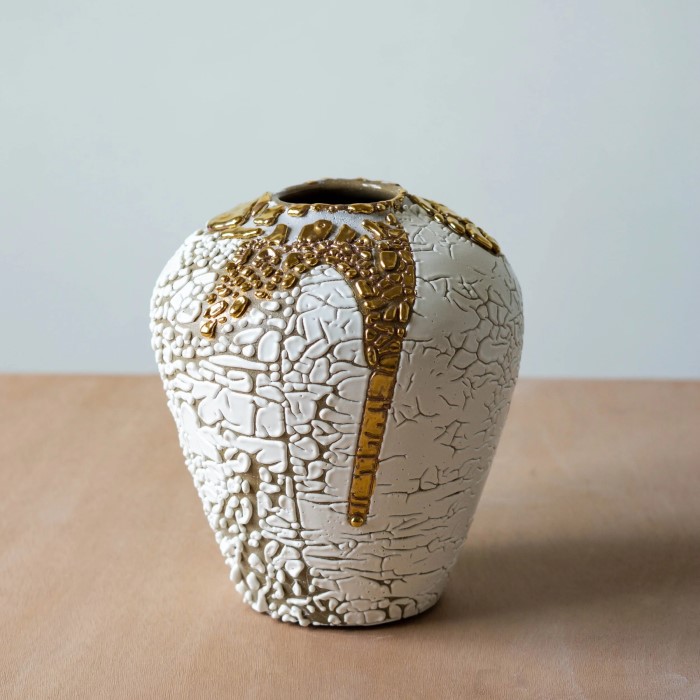
Gold luster ceramic refers to pottery that has been coated with a decorative glaze containing metallic compounds, typically gold. This process imparts a shiny, reflective surface that gives the piece a luxurious appearance. Gold luster can vary in hue, ranging from warm yellow to deep amber, depending on the specific formulation used.
2. Artistic Appeal
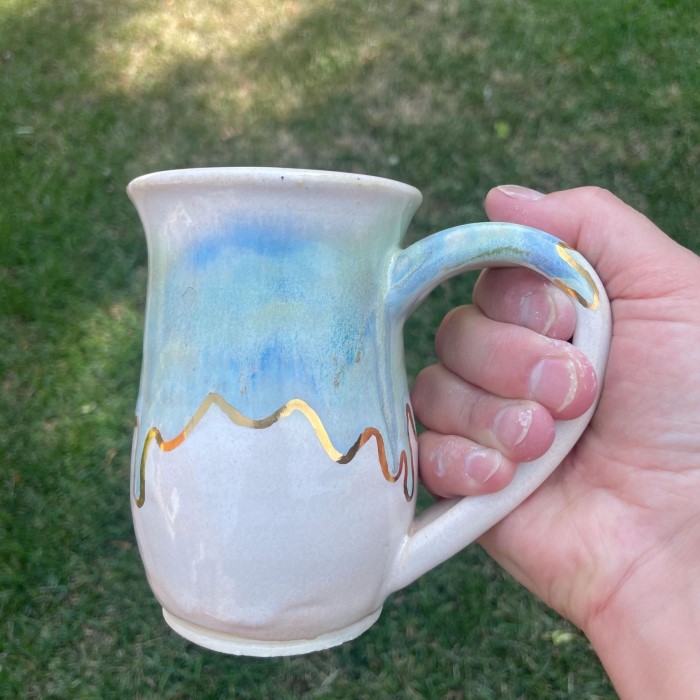
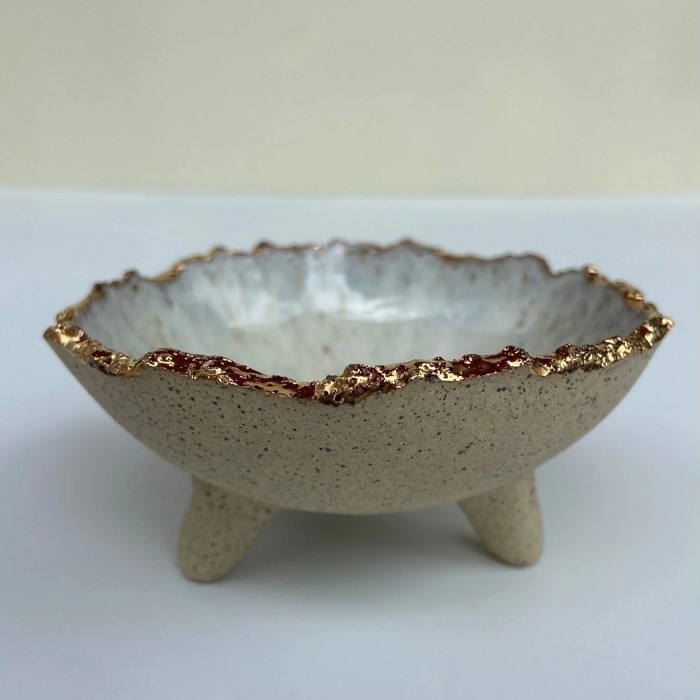
Gold luster finishes are prized for their visual impact. They create an eye-catching contrast against the surface of the ceramic, making each piece stand out. This aesthetic quality has made gold luster pottery highly sought after, both as functional ware and decorative art.
The History
1. Historical Origins
The use of metallic lusters dates back to ancient times, with origins in the Islamic pottery of the 9th century. Artisans crafted stunning pieces using luster techniques that included gold and other metals. These pieces were often celebrated for their decorative potential and luxurious appeal.
2. Evolution Through Time
As pottery techniques advanced, gold luster became more accessible. The Renaissance period brought about incredible innovations in ceramic glazing, allowing for more intricate designs and metallic finishes. Today, modern artists continue to explore and expand upon these historic techniques, blending tradition with contemporary aesthetics.
Techniques for Applying Gold Luster
1. Preparation of the Ceramic Surface
Before applying gold luster, it is crucial to prepare the ceramic surface properly. Start with a clean and dry piece, ensuring that any dust or grease is removed. This will help the luster adhere better and ensure a smooth application.
2. Choosing the Right Luster
Gold luster comes in various types, such as liquid luster and powder luster. Each type has unique characteristics and application methods:
- Liquid Luster: This ready-to-use formula can be brushed on or applied with a sponge for precision. It is ideal for beginners and provides a smooth finish.
- Powder Luster: Mixed with a liquid medium, powder luster allows for more control over the application. It can create more textured and varied finishes.
Application Methods
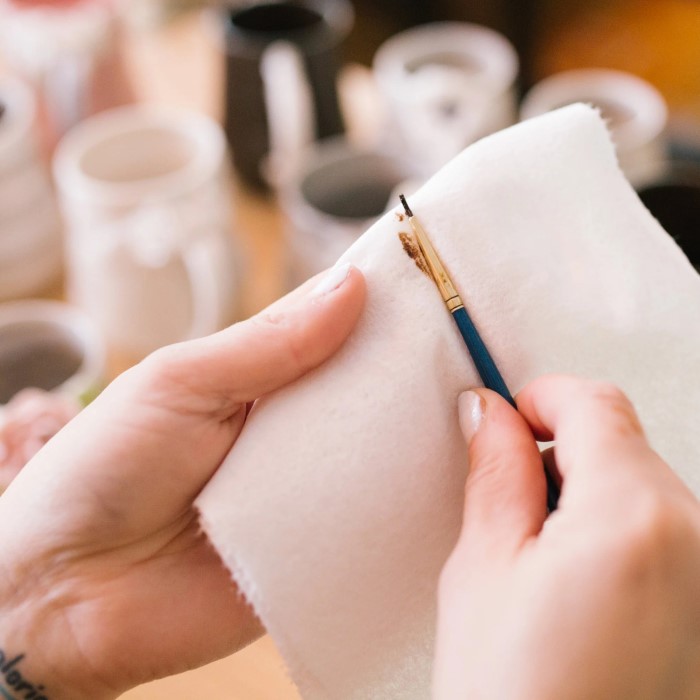
1. Brushing Techniques
Brushing gold luster onto the ceramic surface is one of the most common methods. Here’s how to do it effectively:
Choose the Right Brush
- Soft Brush Selection: When working with gold luster, selecting a soft brush is essential. Softer bristles help to gently apply the luster without scratching or damaging the surface of the ceramic piece. Opt for brushes labeled specifically for fine art or ceramic applications to achieve the best results.
- Control and Precision: A soft brush provides better control and precision during the application. This allows artists to create fine details and reach into crevices or intricate designs without overwhelming the surface with too much product at once.
- Uniform Distribution: The advantage of a soft brush is its ability to distribute the luster evenly across the surface. Even coverage ensures that the final piece has a consistent appearance, which is crucial when aiming to achieve that desired golden sheen.
- Preventing Disturbance: Using a soft brush helps to preserve the integrity of the underlying glaze. Hard bristles may inadvertently disturb or lift the glaze, leading to an uneven finish or unintended textures. A gentle approach is critical when working on delicate or detailed areas.
Thin Coats
- Layering Technique: Applying the luster in thin coats is a fundamental technique in achieving a professional finish. Rather than applying a thick layer all at once, work in layers to allow for better control over the application and coverage.
- Drying Time: Allow each layer of luster to dry completely before proceeding with additional coats. This step is vital, as layering luster while wet can result in smudging, unevenness, or excess buildup that could obscure the glow you desire. Drying times can vary based on environmental conditions, so pay attention to how the luster looks before reapplying.
- Building Richness: By using thin coats, you can gradually build a richer and more vibrant finish. This technique allows the underlying colors to subtly peek through while still maintaining the gold’s luminescence. As you layer, you’ll notice that your piece gains depth and character, enhancing the overall beauty.
- Achieving Even Finish: Thin applications help to ensure an even finish, reducing the chance of streaks or blotches that can occur when too much product is applied at once. This method leads to a smooth, polished effect that maximizes the visual impact of the gold luster.
2. Using a Sponge
A sponge can provide a different texture and effect than a brush. The steps are similar:
- Dab and Apply: Lightly dab the sponge into the luster and then apply it to the surface of the ceramic, using a stippling motion for a unique appearance.
- Layering for Depth: Like brushing, multiple thin layers allow for depth and richness in the luster’s appearance.
Firing and Curing Process
1. Understanding the Firing Process
After the application of gold luster, the piece must be fired correctly to achieve the desired finish. Firing transforms the luster into a durable, permanent bond that can withstand use. It is essential to follow the manufacturer’s guidelines for firing temperatures, as each formulation may vary.
2. Kiln vs. Torching
Gold luster can often be fired in a kiln; however, some products can also be set using a torch. The choice depends on the type of luster and the specific pottery piece:
- Kiln Firing: Ideal for larger batches or delicate pieces, kiln firing provides consistent heat across the entire surface.
- Torching: Suitable for smaller applications or touch-ups; torching requires careful handling to avoid overheating.
Is Gold Luster on Ceramic Food Safe?
1. Safety Considerations
A common question among users is whether gold luster finishes are safe for food contact. The answer varies depending on the specific luster used. Non-toxic gold lusters are available, which can be deemed food safe. However, always check product labels and manufacturer recommendations.
2. Best Practices
To ensure safety, consider the following best practices when using gold luster on functional pottery:
Use Approved Safe Products:
-
- When working with gold luster for decorative food items, it’s essential to select products that are explicitly labeled as food safe.
- Food-safe lusters are specifically formulated to meet health and safety standards, ensuring that they do not release harmful substances when in contact with food.
- Check the labeling carefully for certifications or mentions of compliance with food safety regulations before purchasing. This diligence helps protect both your health and the health of those consuming the items.
- Additionally, consider researching brands or products that have been recommended by reputable sources in the culinary or arts community to ensure you’re using the best options available.
Proper Firing:
-
- Following the firing instructions for applying gold luster is crucial to achieving both adherence and durability of the luster on your ceramics or food-safe surfaces.
- Each type of gold luster may have specific temperature settings and firing times, so it is important to adhere to these guidelines to ensure optimal results.
- Typically, gold luster may require a lower firing temperature compared to other glazes, so make sure to calibrate your kiln accurately for precise firing.
- Proper firing not only allows the luster to adhere properly but also ensures that it becomes more durable and resistant to wear over time, making it suitable for both decorative and functional use.
- After firing, inspect your finished piece to evaluate the adherence and vibrancy of the gold luster; if any issues arise, check the firing conditions and refer to the product’s specific recommendations for troubleshooting.
FAQ: Common Questions
What is the rule of 3’s for oil pastels?
Though primarily related to oil pastels, the rule of threes can also apply to the design of ceramics. Using three significant colors or elements can create balance and harmony in your artwork.
What is gold’s luster?
Gold’s luster refers to its shiny appearance. This characteristic makes it desirable for decorative applications and adds elegance to pottery and other ceramic arts.
How to use gold lustre on ceramics?
To use gold luster, start with a clean, dry ceramic piece. Apply the luster using a brush or sponge, fire the piece according to instructions, and let it cool before use.
Is gold luster on ceramic food safe?
Not all gold lusters are food safe. Always choose products specifically labeled as non-toxic and food safe to ensure safety during use.
Conclusion: Embracing Gold Luster Pottery In Your Art
In conclusion, gold luster pottery represents a beautiful blend of artistry and technique. This guide provides essential insights into creating stunning ceramic finishes that enhance the aesthetic of any piece. By understanding application methods, firing processes, and safety considerations, you can create vibrant and long-lasting works of art.
Whether you are a seasoned potter or an enthusiastic beginner, incorporating gold luster can elevate your pottery projects. Experiment with different techniques and finishes to bring your creative vision to life. With practice and inspiration, your gold luster pottery can shine brightly, reflecting both your skill and artistic flair!