
The Essential Role of External Storage for Mac Mini
The Mac Mini is a marvel of modern engineering. It packs incredible power into a tiny, elegant square. However, this compact design comes with a trade-off. Storage space is often limited and expensive to upgrade internally. Consequently, many users find themselves running out of space quickly. This is especially true for creative professionals dealing with large video files. Therefore, expanding storage is not just an option; it is a necessity. A mac mini external hard drive serves as the perfect solution to this modern problem. It provides the additional gigabytes or terabytes needed for a smooth workflow.

Furthermore, the Mac Mini’s ports are designed for versatility. The Thunderbolt and USB-C ports allow for high-speed data transfer. This makes connecting external drives seamless and efficient. You do not need to worry about slow transfer speeds bottlenecking your system. Moreover, relying on external storage promotes better data hygiene. It encourages users to separate their system files from their personal data. This separation makes backups easier and system updates safer. If your system drive fails, your precious data remains safe on the external unit.
Additionally, the flexibility of external storage is unmatched. You can easily move your files between different computers. You can create dedicated drives for specific projects. For instance, one drive for Time Machine backups and another for your photo library. This organization boosts productivity significantly. In this article, we will explore how to choose the right drive. We will also discuss the best methods for transferring files. Finally, we will troubleshoot common issues to ensure you get the most out of your setup.
Choosing the Right Hardware for Your Needs
Selecting the correct storage device is the first critical step. You must consider speed, capacity, and durability. There are two main types of drives available today: Hard Disk Drives (HDDs) and Solid State Drives (SSDs). HDDs use spinning magnetic platters to store data. They are generally cheaper and offer larger capacities for a lower price. However, they are significantly slower than their SSD counterparts. Furthermore, they have moving parts which makes them more susceptible to physical damage. Therefore, HDDs are best suited for archiving files that you do not access frequently.
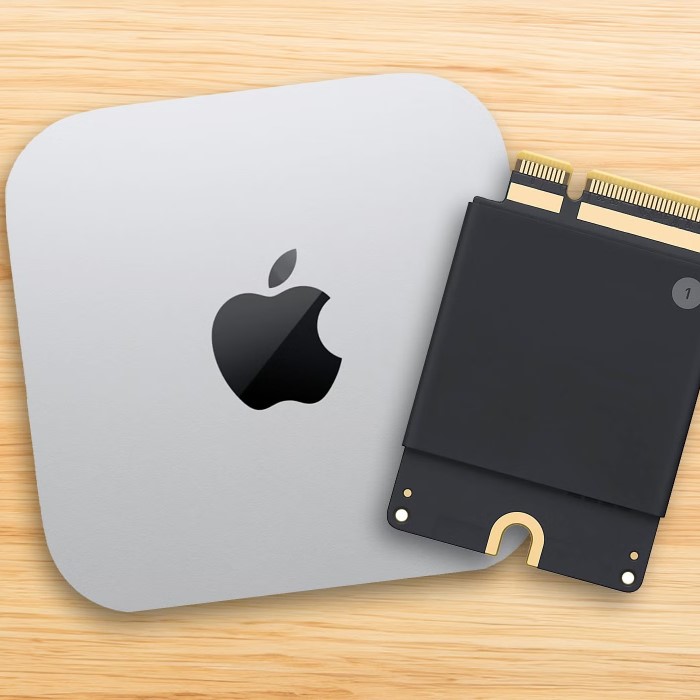
On the other hand, SSDs use flash memory. They have no moving parts. Consequently, they are incredibly fast, silent, and durable. An external SSD can often match the speed of the Mac Mini’s internal drive. This makes them ideal for running applications or editing video directly from the drive. Although they are more expensive per terabyte, the performance boost is worth the investment. For a modern Mac Mini, an SSD is usually the recommended choice. It aligns with the machine’s high-speed architecture.
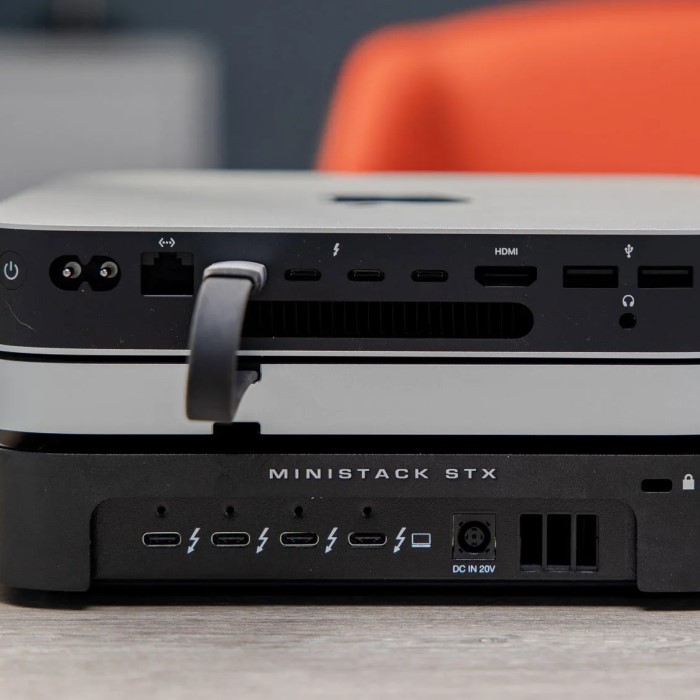
Moreover, you must consider the connectivity options. The Mac Mini features Thunderbolt 3 or 4 and USB-C ports. These interfaces offer blazing-fast data transfer rates. When shopping for a mac mini external hard drive, look for drives that utilize these protocols. A drive with a USB 3.0 connection will work, but it will be slower. Therefore, for the best performance, prioritize Thunderbolt or USB-C compatible drives. Also, consider the physical design. A compact, metal enclosure often matches the Mac Mini’s aesthetic beautifully. It also helps with heat dissipation, ensuring the drive stays cool during heavy use.
Setting Up Your External Drive on macOS
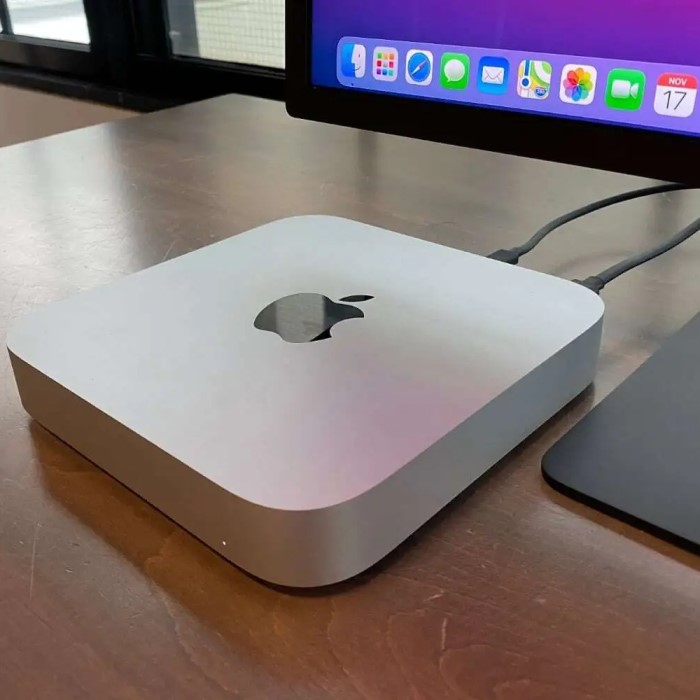
Once you have purchased your drive, the setup process is straightforward. First, connect the drive to your Mac Mini using the provided cable. Use one of the rear Thunderbolt/USB-C ports for the most stable connection. Once connected, the drive should appear on your desktop or in the Finder sidebar. If it does not appear, do not panic. There are a few simple settings to check. Navigate to the Finder menu at the top of your screen. Select “Preferences” and then click on the “General” tab. Ensure that the box for “External disks” is checked.
Furthermore, you should check the Disk Utility application. This is a powerful built-in tool for managing storage. You can find it by pressing Command + Space and typing “Disk Utility.” This tool shows you all connected drives. If your drive is visible here but not on the desktop, it might need to be mounted. Simply select the drive and click the “Mount” button. This action forces the operating system to recognize the volume. Disk Utility is also where you can verify the health of your drive. It provides a “First Aid” feature to scan for and repair errors.
Additionally, new drives often come formatted for Windows (NTFS). macOS can read these drives but cannot write to them without third-party software. Therefore, you may need to reformat the drive for Mac use. We will cover the formatting process in detail later in this article. For now, just ensure the physical connection is secure. Avoid using cheap USB hubs if possible. Connecting directly to the Mac Mini ensures the drive receives adequate power. This prevents the drive from unexpectedly disconnecting or failing to spin up.
Efficient Methods for File Transfer
Transferring files is the primary reason for adding a mac mini external hard drive. There are several ways to do this efficiently. The most common method is the “drag and drop” technique. Open a Finder window containing your files. Then, open a second Finder window for your external drive. Simply click and drag the files from one window to the other. This method is intuitive and visual. However, it can be slow for large numbers of small files. Therefore, for large transfers, consider using the copy and paste commands.
Another powerful method involves the macOS Terminal. While this is more advanced, it offers greater control. The rsync command is particularly useful. It allows you to synchronize folders. This means it only copies files that have changed, saving time on subsequent backups. To use it, open Terminal and type the command followed by the source and destination paths. For example, rsync -avz ~/Documents /Volumes/ExternalDrive/. This command copies your Documents folder to the external drive. It preserves file permissions and timestamps. It is a favorite tool for developers and system administrators.
Furthermore, you can automate the transfer process. Applications like Carbon Copy Cloner or SuperDuper! are excellent for this. They create bootable backups of your entire system. They also allow for scheduled tasks. You can set the software to copy new files to your external drive every night. This ensures your data is always backed up without manual intervention. Automation is the key to a stress-free digital life. It removes the burden of remembering to back up your important work.
Optimizing Storage with Time Machine
One of the most critical uses for an external drive is the Time Machine backup. Apple’s Time Machine is a built-in backup feature. It automatically backs up all your files, including apps, music, photos, emails, and documents. When you connect a new drive, macOS often asks if you want to use it as a Time Machine backup disk. Selecting “Use as Backup Disk” starts the process immediately. It is highly recommended that you dedicate a specific drive solely for Time Machine. This prevents confusion and ensures enough space for backup snapshots.
Time Machine works by keeping hourly backups for the past 24 hours. It also keeps daily backups for the past month and weekly backups for all previous months. Consequently, you can easily recover a file you deleted days or weeks ago. To restore files, simply enter the Time Machine interface. You can navigate through time to find the missing file. This “time travel” metaphor is user-friendly and effective. It has saved countless users from catastrophic data loss. Therefore, setting up Time Machine should be your first priority after connecting a new drive.
Moreover, Time Machine encrypts your backups. This adds a layer of security. If your external drive is stolen, the thief cannot access your data without the password. You can enable encryption during the initial setup. Remember to choose a strong password that you will not forget. Losing the password means losing access to your backups. A mac mini external hard drive used for Time Machine provides peace of mind. It ensures that your digital memories and work projects are safe from hardware failure or accidental deletion.
Formatting Your Drive for Maximum Compatibility
Formatting is a crucial step for ensuring your drive works correctly. As mentioned earlier, many drives come pre-formatted for Windows. To use a drive seamlessly with a Mac, you should reformat it. The standard file system for modern macOS is APFS (Apple File System). It is optimized for SSDs and Flash storage. It offers strong encryption, space sharing, and fast directory sizing. Therefore, if you plan to use the drive exclusively with your Mac Mini, APFS is the best choice. It provides the best performance and reliability.
However, you might need to use the drive with Windows computers as well. In that case, APFS is not ideal. Windows cannot read APFS drives natively. Instead, you should choose ExFAT. This file system is compatible with both macOS and Windows. It allows for reading and writing on both platforms. It also supports large file sizes, which is essential for video files. Therefore, ExFAT is the perfect bridge format. It offers flexibility for mixed environments. To format, open Disk Utility, select the drive, and click “Erase.” Then, choose the desired format from the dropdown menu.
Furthermore, be careful when formatting. This process erases all data on the drive. Ensure you have backed up any existing files before proceeding. Also, pay attention to the “Scheme” option. For modern Macs, “GUID Partition Map” is the correct choice. This allows the drive to be bootable if you ever need to install macOS on it. Older schemes like “Master Boot Record” or “Apple Partition Map” are largely obsolete. Using the correct scheme ensures your drive functions properly with the Mac Mini’s startup process.
Troubleshooting Common Connection Issues
Sometimes, technology does not cooperate. You might connect your drive and find it is not recognized. There are several common reasons for this. First, check the cable. Cables can fail internally without visible damage. Try using a different cable to rule this out. Second, check the port. The Mac Mini has multiple ports. Try plugging the drive into a different one. Sometimes a specific port may have a glitch or a loose connection. Furthermore, dust or debris in the port can prevent a good connection. Use a can of compressed air to clean the ports gently.
Another issue involves power delivery. Some larger external hard drives require more power than the Mac Mini’s port provides. If the drive has an external power adapter, ensure it is plugged in. If it is a bus-powered drive, it might try to draw too much power. This can cause the drive to click or spin up and down repeatedly. In this case, you might need a powered USB hub. A hub with its own power adapter can provide sufficient juice to the drive. This stabilizes the connection and prevents data corruption.
Additionally, software conflicts can occur. Sometimes, a background application might be blocking the drive. Restarting your Mac Mini often resolves these temporary software glitches. You can also check “System Information” to see if the drive is detected at the hardware level. Click the Apple menu, hold the Option key, and click “System Information.” Go to the “USB” or “Thunderbolt” section. If the drive appears here but not in Finder, it is a software mounting issue. Use Disk Utility to mount it manually. These steps usually resolve the majority of connection problems.

Frequently Asked Questions
Users often have specific questions regarding external storage. Here are answers to some of the most common queries.
Can I use an external hard drive with a Mac mini?
Yes, absolutely. The Mac Mini is designed to work seamlessly with external storage. You can connect drives via USB-C or Thunderbolt. The Mac Mini can read and write to these drives. You can even run applications or the operating system itself from an external drive. It is a standard and recommended practice for expanding the Mac Mini’s capabilities.
Why can’t I copy photos from Mac to external hard drive?
This issue is usually caused by the file system format. If your drive is formatted as NTFS (common for Windows drives), macOS can read it but cannot write to it. To fix this, reformat the drive to ExFAT or APFS. Be aware that reformatting erases all data. Alternatively, you might not have the correct “Read & Write” permissions. You can change permissions by right-clicking the drive, selecting “Get Info,” and adjusting the settings at the bottom.
How do I transfer photos from my iPhone to my Mac mini?
Connect your iPhone to the Mac Mini using a USB cable. Open the “Image Capture” app or the “Photos” app. The device will appear in the sidebar. You can select the photos you wish to import. Once imported to your Mac Mini’s internal drive, you can then move them to your external hard drive. This two-step process ensures your photos are safely stored and backed up.
Conclusion
Expanding your storage capabilities is essential for any Mac Mini user. The compact power of the computer pairs perfectly with external storage solutions. Whether you are a creative professional or a casual user, the benefits are clear. A mac mini external hard drive provides the space needed for large projects and secure backups. We have explored the different types of hardware, from HDDs to SSDs. We have also discussed the importance of file formats like APFS and ExFAT. Furthermore, we have provided step-by-step guides for transferring files and troubleshooting issues. By following this guide, you can ensure your workflow remains efficient and your data stays safe. Take control of your digital storage today and unlock the full potential of your Mac Mini.